
Here's How: Decorative Window and Door Trim
Dear James: Over the years, our pets and children and scratched the wooden window and door trim. Is it possible to replace the trim without buying woodworking power tools? -- Char W.
Dear Char: New window and door trim can make a tremendous improvement in the overall appearance of any room. There are many new styles and profiles of trim stock available, so you should have no problem finding one to complement your room's current decor.
It is not a difficult project to install new window and door trim yourself, even if you have only hand tools. It just requires painstaking care so the finished job looks right. Many homes have poorly fitted trim because some builders and carpenters do not invest the time necessary to fit all the joints properly. They rely on filling gaps with caulk, which eventually becomes apparent.
There are several types of composite trim materials available, and they look very nice. Since you are obviously new to fitting trim, it is probably best to stick with wood. You may have to do some final filing, sanding or carving for that perfect joint, and wood is generally the easiest material to work with.
After you select the trim profile that you want, carefully check each piece of trim that you buy, especially the profile at the ends. When lumberyards and home centers get deliveries of trim stock, it may have come from two or three different runs at the lumber mill. Measure the thickness and compare the end profiles for pieces with the most uniformity.
The greatest problem that you will have is a window or door jamb that extends out just slightly from the wall. When the trim rests against this projection and the wall, it will be tilted slightly. Just a slight tilt is enough to cause joint gaps, even with perfect 45-degree miter cuts on the ends.
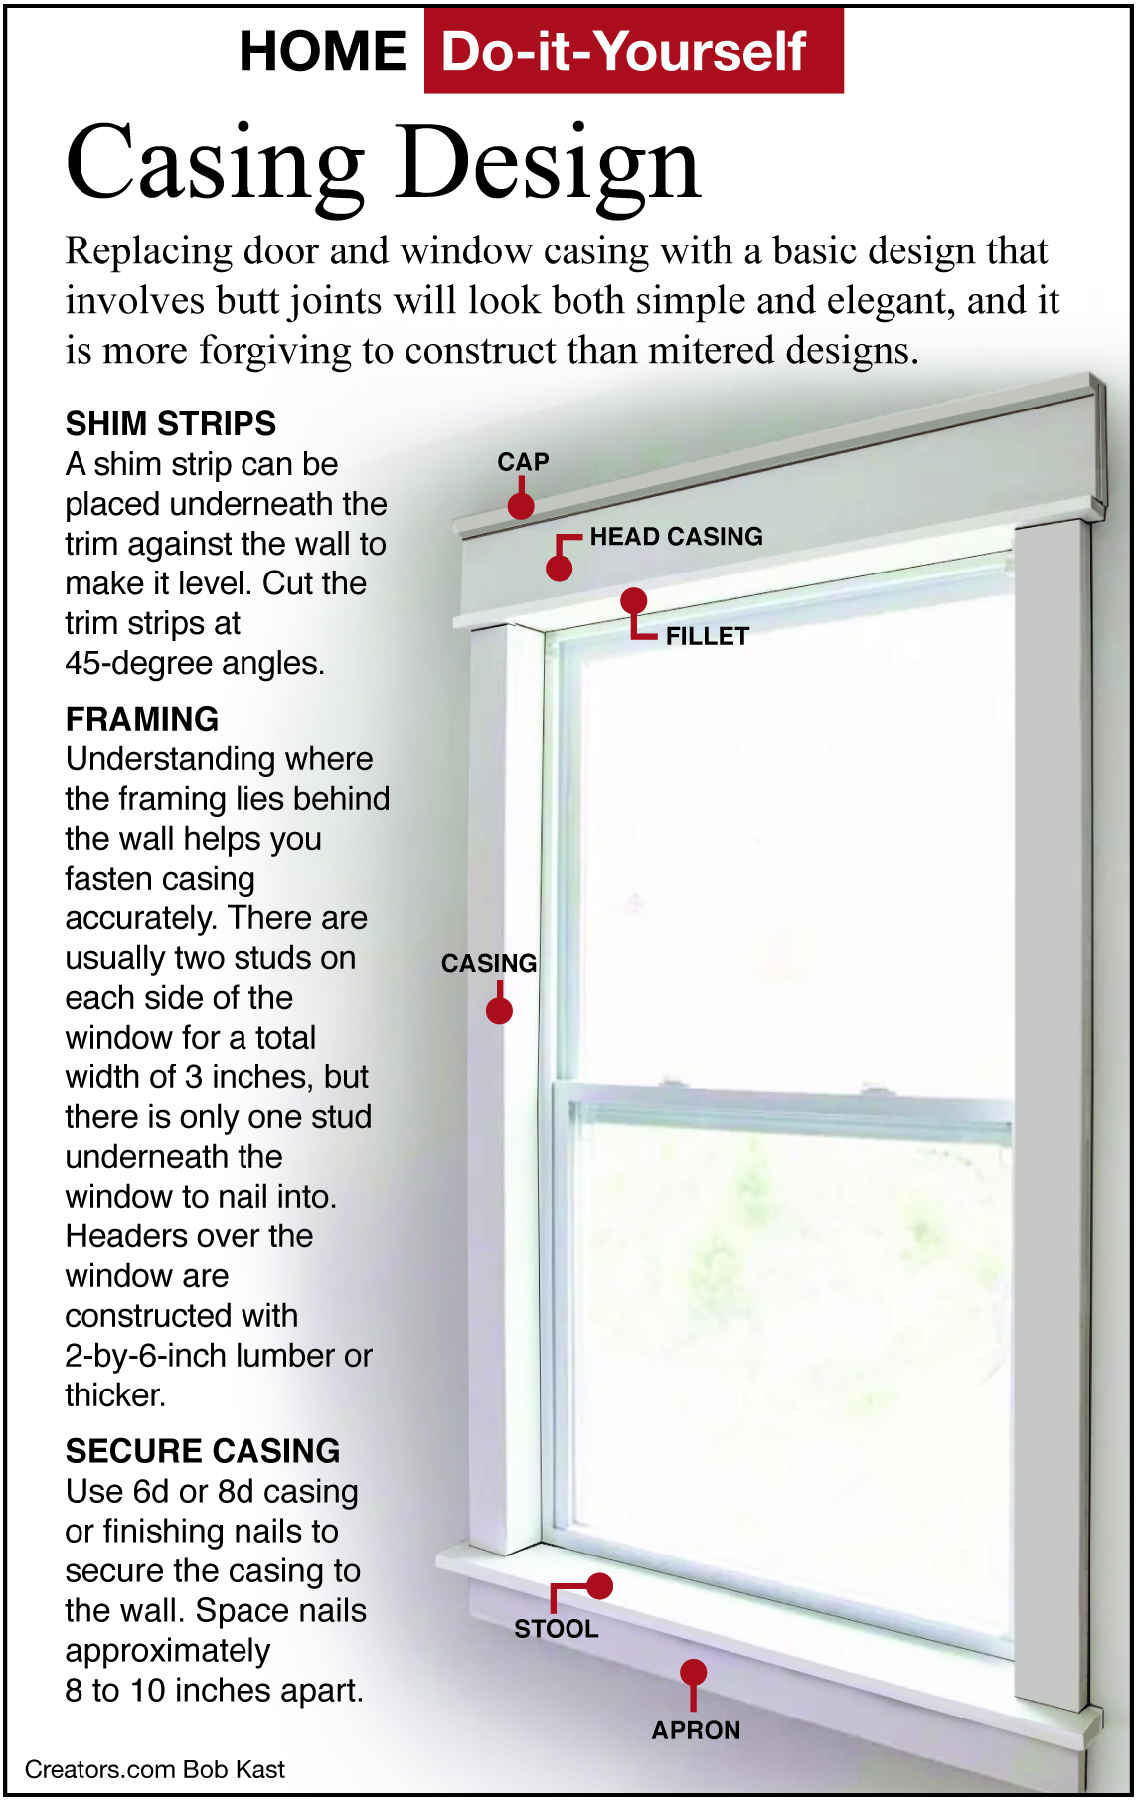
If you are going to paint the trim, slip a thin shim (the thickness of the jamb projection) between the trim and the wall to make it level. If you are going to just stain the trim, the shim will show. The best method for this situation is to cut or sand off the jamb projection.
Another (less technically perfect) solution is to miter cut the trim piece as usual. Using a sharp utility knife, and heavy work gloves for safety, shave off the back side of the mitered edge. Make sure not to cut into the visible profile surface. This will allow the visible surfaces to meet flush without a gap.
To get a clean, crisp edge, lay a straightedge along the profile surface and cut the 45-degree line with a sharp utility knife before sawing. This will keep any of the wood fibers from tearing when the saw teeth start to cut through the surface from the back.
Hand nail the trim to the wall with finishing nails. Choose a nail that will penetrate the lumber beneath the drywall to a depth of about 1 inch. Drive them in leaving the nail head projecting just a little. Use a nail set to countersink the nail head and then fill it with wood filler.
========
Send your questions to Here's How, 6906 Royalgreen Dr., Cincinnati, Ohio, 45244 or visit www.dulley.com. To find out more about James Dulley and read features by other Creators Syndicate writers and cartoonists, visit the Creators Syndicate website at www.creators.com.
Copyright 2025 Creators Syndicate Inc.


Comments